จาก Entry ที่แล้วเราสามารถจะสร้าง TableView ขึ้นมาใช้งานได้
โดยที่เราทำได้คือ การสร้าง Table แสดงข้อมูล การเลือก Row ใน Table
Entry นี้ก็จะมาต่อกันที่การลบนะครับ
เริ่มจากการเปลี่ยนชนิดของตัวแปรที่ใช้เก็บข้อมูลของ Table (_tableData) ก่อนครับ
จาก NSArray เป็น NSMutableArray เพื่อให้เปลี่ยนแปลงแก้ไขข้อมูลได้ครับ
ส่วนของ interface (.h)
NSMutableArray *_tableData;

ส่วนของ implementation (.m)
_tableData = [[NSMutableArray alloc] initWithObjects:@"Data1", @"Data2", @"Data3", nil];

เพิ่ม Method
-(void)tableView:(UITableView *)tableView commitEditingStyle:(UITableViewCellEditingStyle)editingStyle forRowAtIndexPath:(NSIndexPath *)indexPath{
if (editingStyle == UITableViewCellEditingStyleDelete) {
[_tableData removeObjectAtIndex:indexPath.row];
[tableView deleteRowsAtIndexPaths:[NSArray arrayWithObject:indexPath] withRowAnimation:YES];
}
}

เราก็จะสามารถลบ Row ใน Table ได้แล้วครับ
ต่อไปก็จะเป็นการทำ Table ที่มีหลายๆ Section นะครับ
เริ่มจากเพิ่ม Property ใน interface
NSArray *_sectionName;

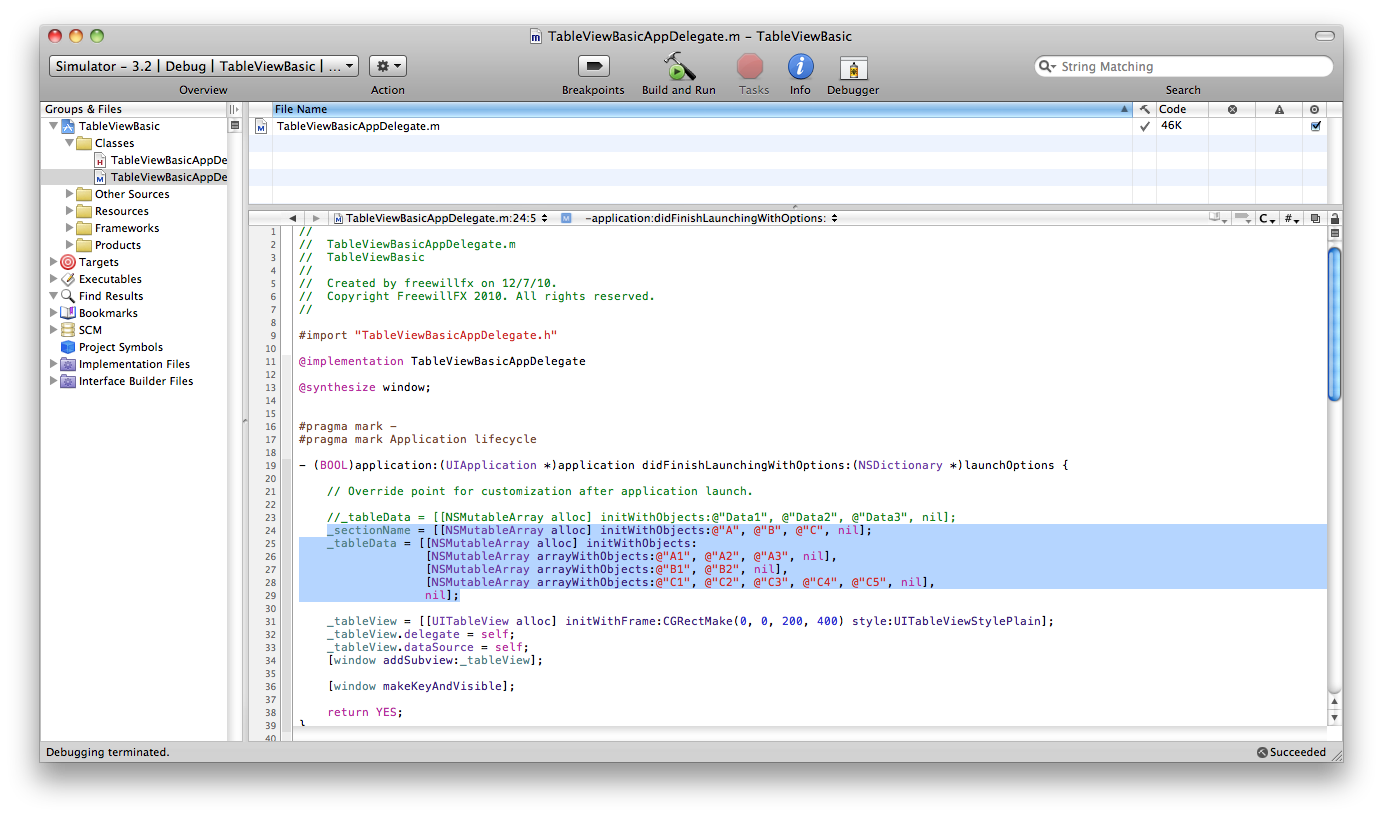
สร้าง Array ใน implementation (ทำง่ายๆ นะครับ เอาไปประยุกต์ใช้)
_sectionName = [[NSMutableArray alloc] initWithObjects:@"A", @"B", @"C", nil];
_tableData = [[NSMutableArray alloc] initWithObjects:
[NSMutableArray arrayWithObjects:@"A1", @"A2", @"A3", nil],
[NSMutableArray arrayWithObjects:@"B1", @"B2", nil],
[NSMutableArray arrayWithObjects:@"C1", @"C2", @"C3", @"C4", @"C5", nil],
ปรับ Code ส่วนของ UITableViewDelegate และ UITableViewDataSource
-(void)tableView:(UITableView *)tableView didSelectRowAtIndexPath:(NSIndexPath *)indexPath{
NSLog(@"%@", [[_tableData objectAtIndex:indexPath.section] objectAtIndex:indexPath.row]);
}
-(UITableViewCell *)tableView:(UITableView *)tableView cellForRowAtIndexPath:(NSIndexPath *)indexPath{
UITableViewCell *cell = [tableView dequeueReusableCellWithIdentifier:@"tableCell"];
if (cell == nil) {
cell = [[[UITableViewCell alloc] initWithStyle:UITableViewCellStyleDefault reuseIdentifier:@"tableCell"] autorelease];
}
cell.textLabel.text = [[_tableData objectAtIndex:indexPath.section] objectAtIndex:indexPath.row];
return cell;
}
-(NSInteger)tableView:(UITableView *)table numberOfRowsInSection:(NSInteger)section{
return [[_tableData objectAtIndex:section] count];
}
เพิ่ม Method -(NSInteger)numberOfSectionsInTableView:(UITableView *)tableView
-(NSInteger)numberOfSectionsInTableView:(UITableView *)tableView{
return [_tableData count];
}
เพิ่ม Method -(NSString *)tableView:(UITableView *)tableView titleForHeaderInSection:(NSInteger)section
-(NSString *)tableView:(UITableView *)tableView titleForHeaderInSection:(NSInteger)section{
return [_sectionName objectAtIndex:section];
}
-(void)tableView:(UITableView *)tableView commitEditingStyle:(UITableViewCellEditingStyle)editingStyle forRowAtIndexPath:(NSIndexPath *)indexPath{
if (editingStyle == UITableViewCellEditingStyleDelete) {
[[_tableData objectAtIndex:indexPath.section] removeObjectAtIndex:indexPath.row];
[tableView deleteRowsAtIndexPaths:[NSArray arrayWithObject:indexPath] withRowAnimation:YES];
}
}

*ย้าย Position ของ UITableView ไว้กลางจอ เพื่อให้เห็นชัด
_tableView.center = window.center;
ลองเอาไปประยุกต์ใช้นะครับ


